Walkthrough of the Hatching Process
Experience and Learn Egg hatching with the 12 Day Chicken Hatching Program
Recommended for Early Learning School centers, Aged Care, different companies and at homes for personal learning experience. Providing Chicken Programs Since 2001 to Sydney, Central Coast, Canberra and the Illawarra.
BOOK Your Chicken Hatching Program here.
Watching baby chickens hatch is both magical and super stressful. You may be wondering if you should jump in to help or if what’s happening is actually on track and normal.
To make you feel a bit better and to help you enjoy the hatch more, I will attempt to explain what happens during hatching. The hatching process is absolutely necessary for the health of a chick so read on to prepare yourself.
Pre-hatching: Day 18 of incubation
By day 18 of incubation, the embryo in the egg will have developed into a chick taking up most of the space inside the egg. The chick will start to prepare for hatching so it is advised to stop egg turning around day 18. You can do candling on your remaining eggs to see that development is on track and your chicks are alive and ready to hatch.
When you stop egg tuning, make sure the larger end of the egg is facing upwards. This will help the chick when hatching day comes. The chick will rotate and prepare itself for hatching. Make sure to maintain a temperature of 38.05°C (100.5°F) but increase the humidity to 70%.
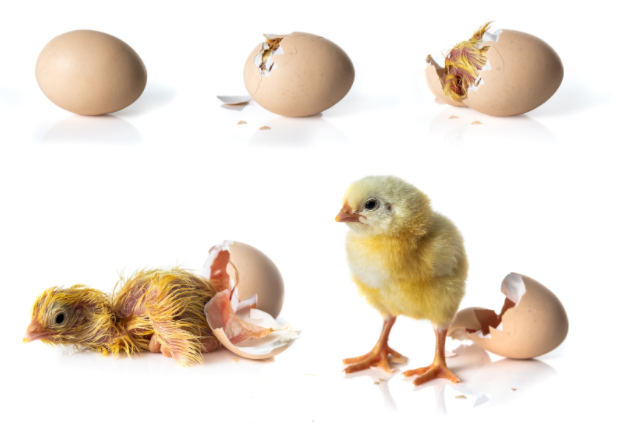
Behind the shell: Day 20 of incubation
On day 20 the chick absorbs the last of the egg yolk. This will help them survive for several hours without food or water after hatching. At this point the chick is completely filling the egg except for the air cell, the chick is now ready to hatch. You might hear soft cheeping coming from the egg, if you don’t, don’t worry it is normal.
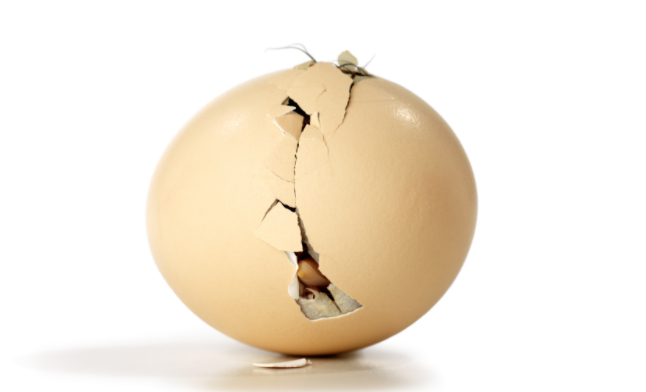
You might find the first crack in the egg but nothing else is happening. The crack might also be at the bottom of the egg. Don’t worry this is still normal and the chick knows what it’s doing.
Also don’t panic if there are no more signs of movement after the first crack appeared. The chick is only resting, for 3 weeks it was comfortable doing very little inside the egg. Hatching takes a lot of work so the chick will rest often.
Hatching day: Day 21
Chicks will typically hatch around day 21 unless the eggs were cooled before the start of incubation. If the eggs were cooled, give them a few extra days to hatch. When the day of hatching finally arrives, try to stay on the sidelines and let the chicks enter the world on their own.
On the inside of the egg is a membrane that contains blood vessels that are attached to the chick. If you prematurely try to help the chick to hatch, you can sever the vessels that have not yet dried and cause severe, potentially fatal bleeding. Hatching can take 24 to 48 hours depending on the size and breed of the chick. Most hatchings, however, will happen within 5 to 7 hours.
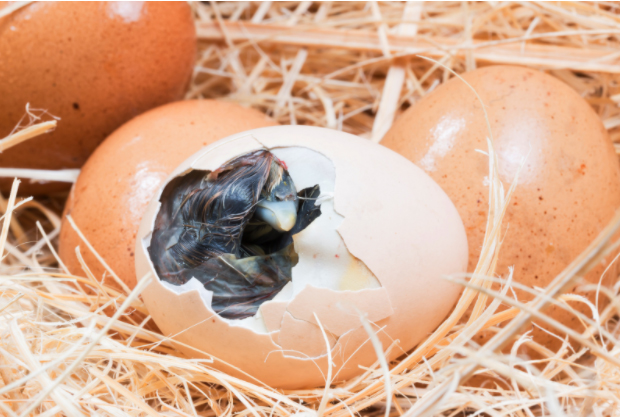
Before eggs start hatching, you should be able to hear soft peeping coming from inside the eggs. The chicks will then use their egg tooth to crack the egg from the inside. The egg tooth is a little white nub that sits on top of the beak of a newborn chick.
Once a crack is created, the chick will strain to break the egg open further. During this time they will be strengthening their muscles and draining blood out of the membrane inside the egg. It is very important to leave them to it at this stage.
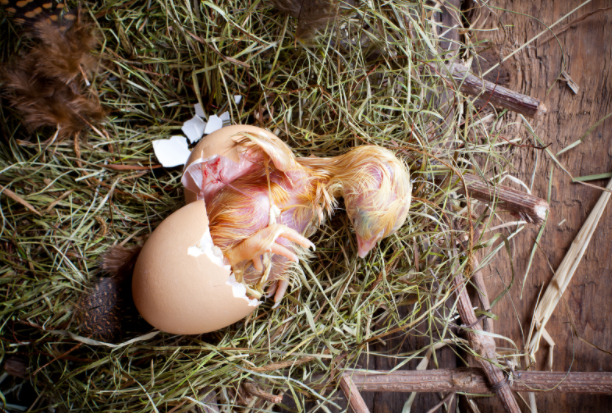
Once the chick has emerged, it is important for them to eat the membrane left in the shell. This membrane contains vital nutrients necessary for a healthy immune system in your newly hatched chicks. Leave the shells with the chicks while still in the incubator.
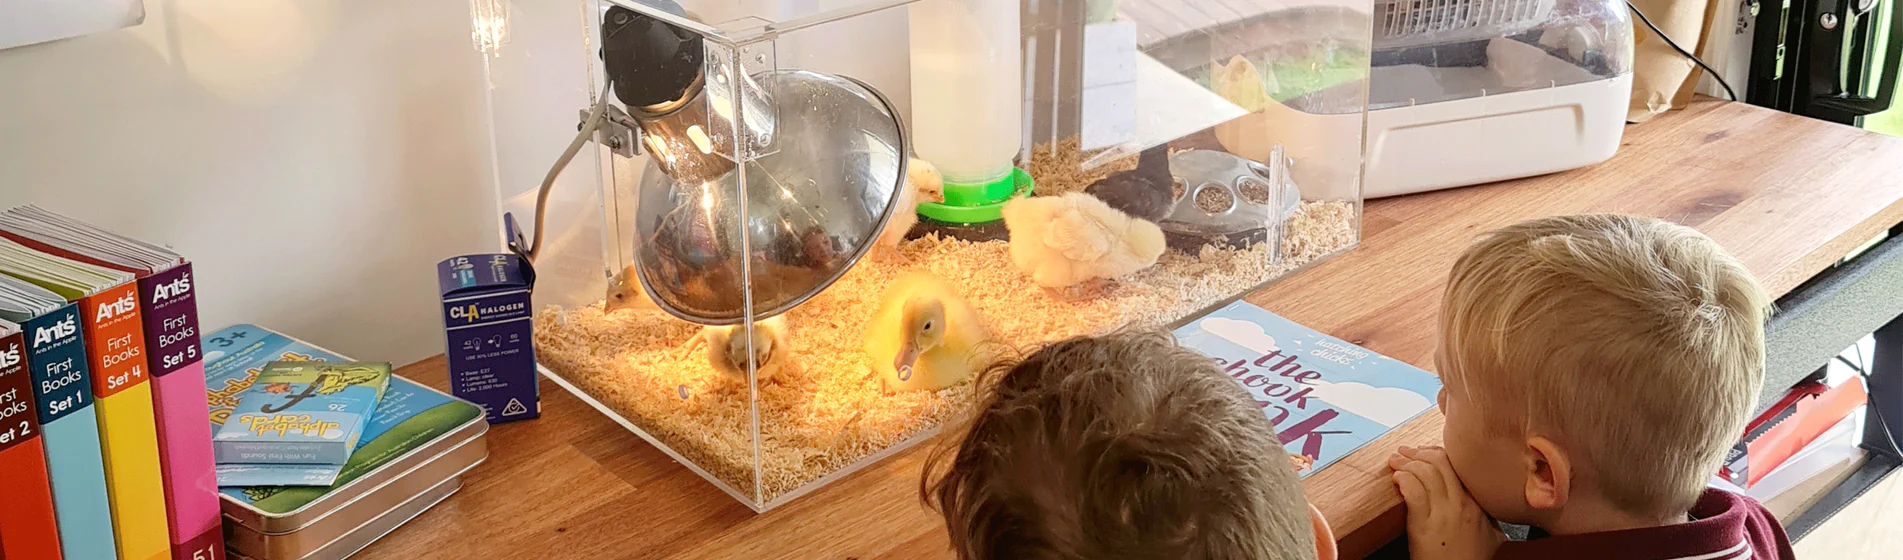
It is also important to not immediately remove the hatched chicks from the incubator. The cheeping of hatched chicks will encourage the unhatched chicks to start the hatching process. Have a brooder ready regardless for moving the chicks at a moment’s notice.
Once the chicks have hatched, the incubator temperature can be lowered to 35°C (95°F). Once the chicks have dried, they can be moved to the brooder which should have been prewarmed to 32.22 – 35°C (90 – 95°F). Food and water should already be in place as well.
If you still have unhatched eggs by the end of day 21, don’t despair, something might have gone wrong with the timing. Candle the remaining eggs to see that they are still alive and replace them in the incubator for another two days at 38.05°C (100.5°F). If the eggs did not hatch by day 23, candle them again before discarding to make sure you don’t accidentally throw away a perfectly healthy chick.
Make sure to read up on how to care for a newly hatched chick! Happy hatching.

