PRIMary guide FOR egg candling
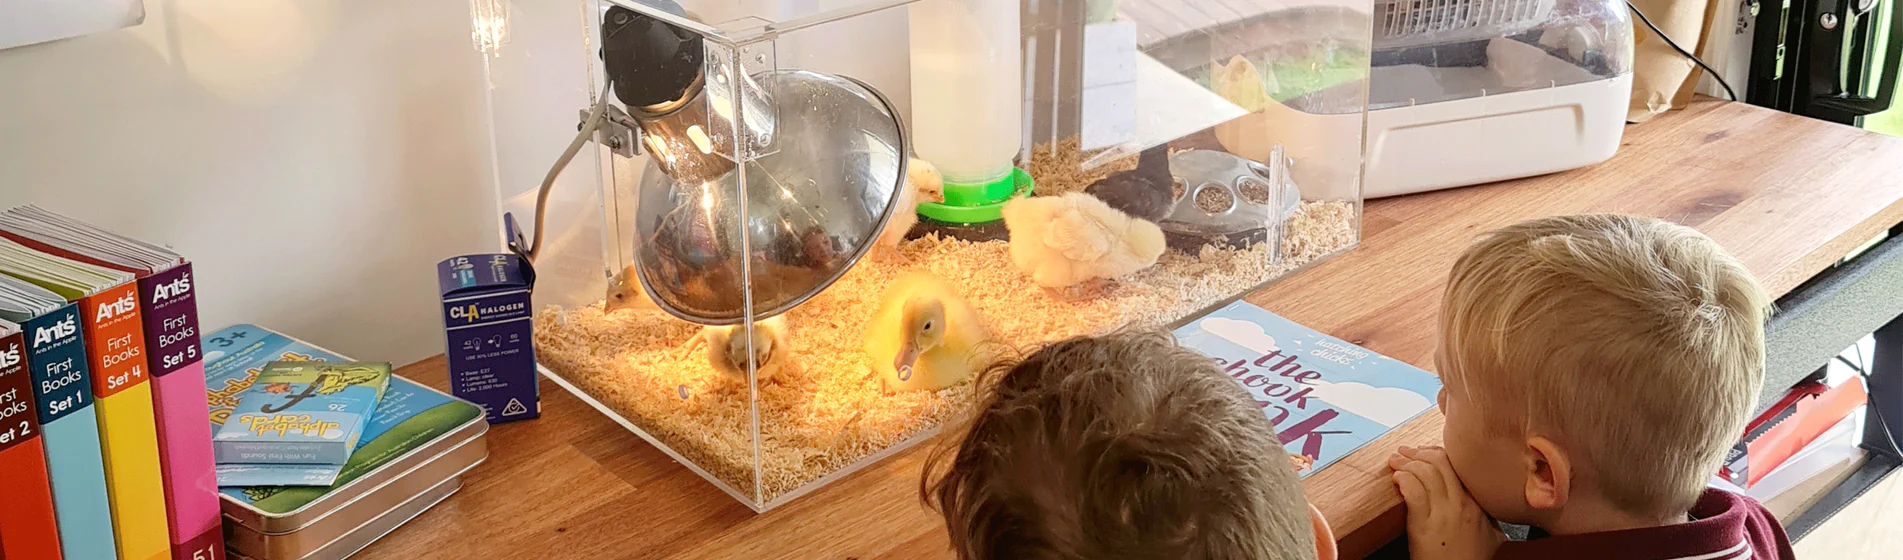
Experience and Learn Egg hatching with the 12 Day Chicken Hatching Program
Recommended for Early Learning School centers, Aged Care, different companies and at homes for personal learning experience. Providing Chicken Programs Since 2001 to Sydney, Central Coast, Canberra and the Illawarra.
BOOK Your Chicken Hatching Program here.
Candling is one of the necessary steps when you do incubation yourself. Candling helps you to identify if an embryo is developing as it should, or if the egg is a dud. You can think of candling as an ultrasound for eggs. It is really easy to do and you can save yourself a lot of trouble by identifying and removing a bad egg early on.
When To Candle Your Eggs
Candling should be done at least 3 times during the incubation process. Some suggest that you do candling on day 4, 10 and 17 of incubation. Others suggest that you do it on day 7, 14 and 18 of incubation. Personally, I would suggest that you do candling on day 4, 10 and 18.
My reasoning behind this is that on day 4 you need to check which of your eggs are viable and alive so that you can remove any duds early on. On day 10 you will be able to check the progress that was made from day 4 and remove the eggs that unfortunately died during that time frame. Day 18 is the last day you should do anything with your eggs before hatching so it is a good idea to see the progress of the chick just before hatching so you can remove the dead ones.
On day 18 you should stop turning and disturbing your eggs so the fetus ca
n position itself for hatching. If you want, you can do candling on all above mentioned days or more, just remember that your eggs need to stay in a stable humidity and temperature to stay alive so you might do more harm than good.
What Do You Need
To do candling correctly you will have to make sure that you have the following available:
- A bright light
To do candling you will need some form of bright light. The light will have to be smaller than the diameter of the end of the egg. You can buy a special candling light or you can use a small torch
- A dark room
You will need a dark room to make it easier to see what is inside the egg.
How To Candle Eggs Correctly

Hold or place the egg at an angle that gives you access to the large end of the egg. If you can’t see anything inside the egg, adjust the angle until you can. If you can’t see anything inside the egg no matter what angle you use, the embryo might have died or the egg might have been infertile. Remove the empty egg from the rest immediately.
What To Look For
There are a number of things to look out for when candling your eggs that will give you an insight into the health of the embryos. You will also be able to identify the eggs that have gone bad or that are duds.
Day 4 Candling
On day 4 of incubation, you need to check if all your eggs are viable and remove those that are not. There are a few things you can look out for when doing candling on day 4 to make it easier for you to establish if your embryo is doing well or if they didn’t make it. Make sure to create a drawing to remember what you saw for your next candling. The things you need to look out for while doing your first candling, they are:
- A spot in the middle of the egg that appears darker than the rest
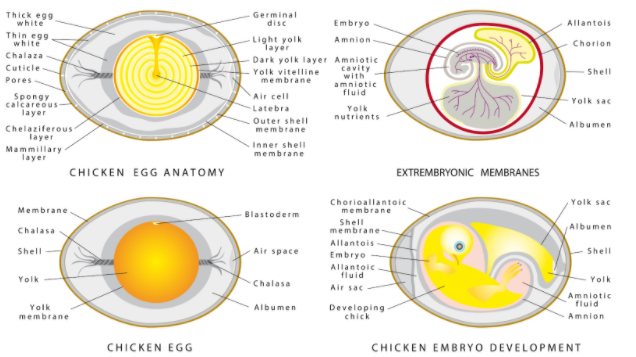
If the embryo is healthy and growing, you should be able to make out the shadow it casts on the eggshell when you candle the egg. It will appear as a dark spot kind of in the middle of the egg.
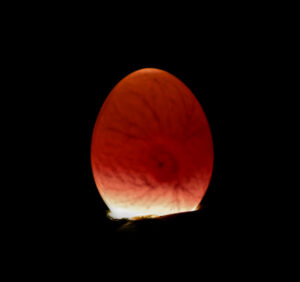
- Veins
You should be able to make out tree branch-like veins coming from the embryo if it is still alive and healthy.
- A blood ring
If the embryo, unfortunately, didn’t make it through the initial stages of development and has died, you will notice a red blood ring around the outer edge of the egg. If you notice this ring and no black spot, remove the egg from the pile immediately. It can infect other eggs causing them to die as well.
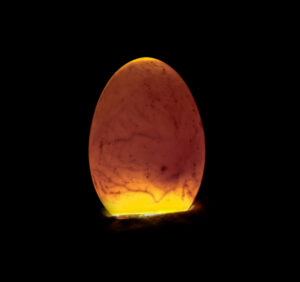
- A clear egg
If the egg is clear no matter what angle you adjust it too, then your egg might have been infertile or it has been too old to incubate successfully. Remove this egg from the pile unless you want it to go bad and explode in the incubator.
Day 10 Candling
It is advised that you do candling again on day 10 to keep track of the progress your embryos are making. It is also a chance to remove any that might have died since the last candling before a disaster happens inside your incubator. For this candling, you need to look out for the following:
- A bigger black spot
It should be much easier to see the dark spot where the embryo has developed compared to the last time you did candling. Remember to keep track by making another drawing. You can mark your eggs with a number to keep the right drawing with the right egg.
- Veins
You should be able to see the veins extending from the embryo much more clearly now. There should also be more veins than before.
- Blood rings
If you see any blood rings around the egg then your embryo most likely didn’t make it. The veins would also have broken down somewhat so if it is hard to see the veins along with a definite blood ring, remove the egg from the incubator immediately.
- Spots
If you see any strange spots in the egg beside the embryo, then the embryo most likely didn’t make it. These spots are often accompanied by blood rings and an absence of veins extending from the embryo. Remove the egg from the incubator immediately.
Day 17 Candling
It is advisable to check your eggs one last time before you cannot move them anymore. By day 18 the fetus needs time to settle and get ready for hatching. You will save yourself some heartache if you remove eggs that didn’t make it before waiting on hatching day and nothing happens. What you need to look for any of the following:
- A large dark area
The embryo will be near ready to hatch at this point so should take up most of the egg. Only a small area where the yolk is should still be visible along with veins.
- Blood rings
If the embryo hasn’t grown as it should and there are blood rings present or any foul smells coming from the eggs, you should remove it from the incubator. Unfortunately, that embryo didn’t make it.
Another Thing To Look Out For
- Hairline cracks
Hairline cracks are very small cracks in the shell of the egg. They will appear like white veins when you do candling. If you notice any hairline cracks, it is best to remove the egg from the incubator. Hairline cracks can allow bacteria in and out of the egg causing the death of the embryo and possibly the rest of your eggs if it does explode due to a gas build up in the decomposing egg.
All in all, candling is a quick way to determine how healthy your embryo is and if you need to remove any of the eggs currently in incubation. It is important to have an incubator with a stable temperature and humidity if you want your eggs to develop into hatchlings.
There is so much to learn when it comes to incubation and chickens in general, so never give up it will become easier as you go along and learn more.
